API Integration Installation (On-Premise)
This page guides the Partner's infrastructure team through self-installing the signing API cluster ("Sign Server") directly on their own infrastructure
Requirements
Deployment Architecture
The API: Sign Server cluster is installed directly on the partner's infrastructure using the API package provided by Intrust DSS. It receives signing requests and forwards them for processing to IntrustCA, the public Digital Signature Certification Authority.
Infrastructure requirements for the API installation cluster (minimum 1, recommended 2):
| Item | Requirement |
|---|---|
| Operating System | Windows Server 2019 Standard (or higher) |
| CPU | 8 Core |
| RAM | ≥ 16GB |
| .NET Framework | 4.7 |
| Network | Internet connection open |
Web Server Service
The API runs on the IIS (Internet Information Services) platform.
Installing IIS
Install IIS following the standard Windows Server procedure (no RMS-specific steps):
-
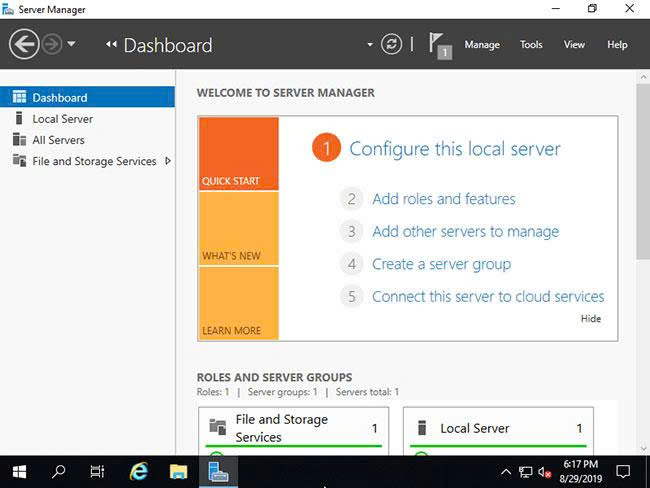
Run Server Manager and click Add roles and features.
-
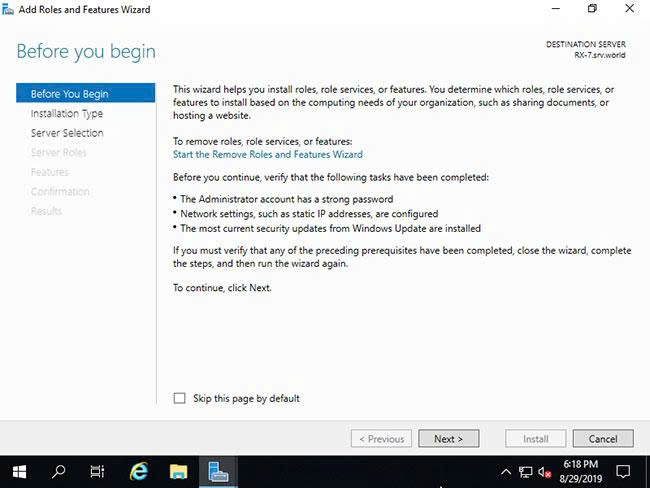
Click the Next button (the "Before you begin" screen).
-
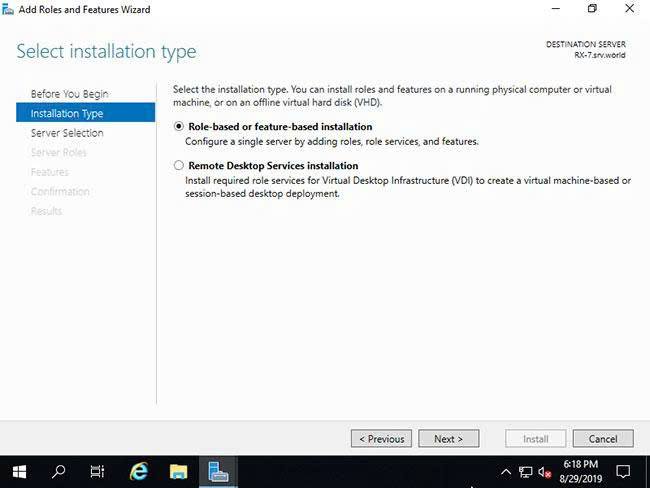
Select Role-based or feature-based installation.
-
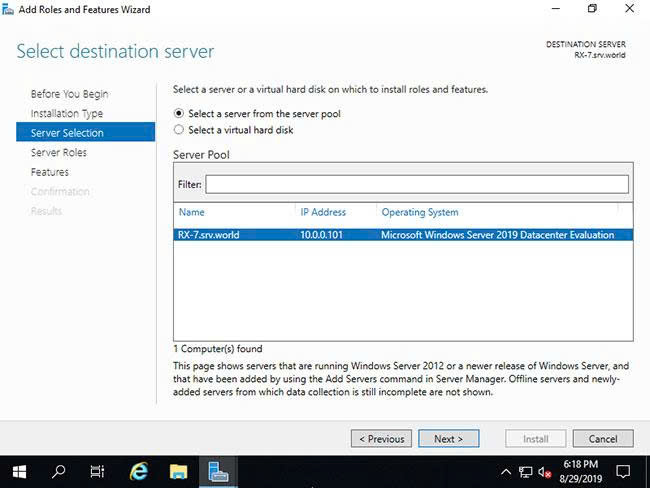
Select the host (server) you want to add the services to.
-
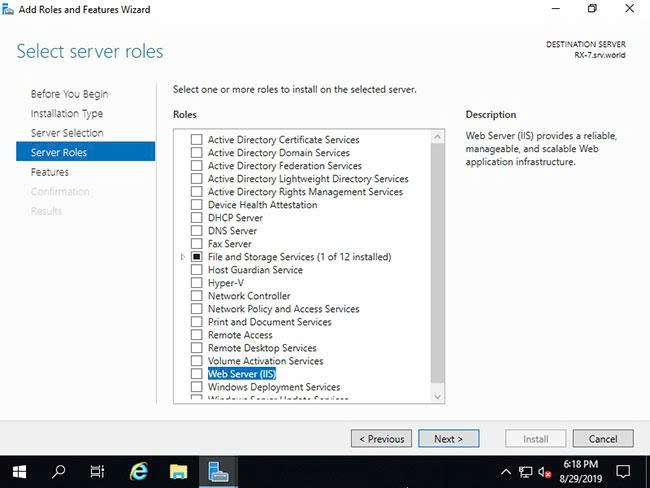
Check the Web Server (IIS) box.
-
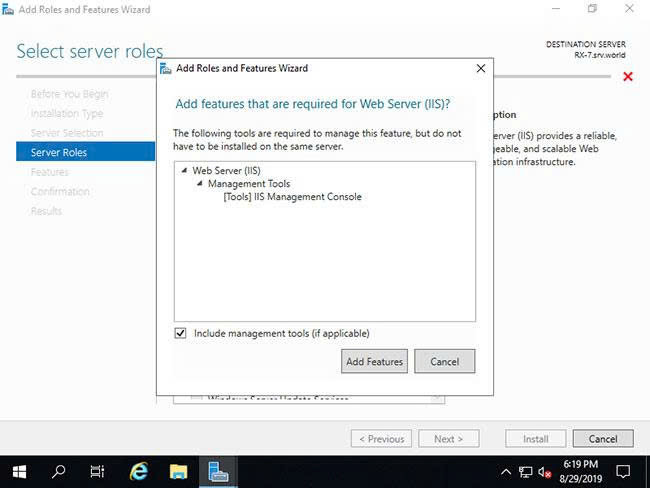
Additional features are required to add the IIS Server — click Add Features → Next.
-
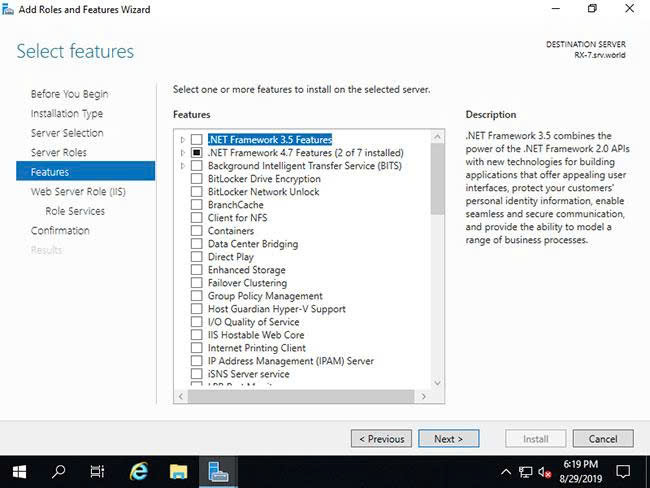
Click the Next button (the Select features screen).
-
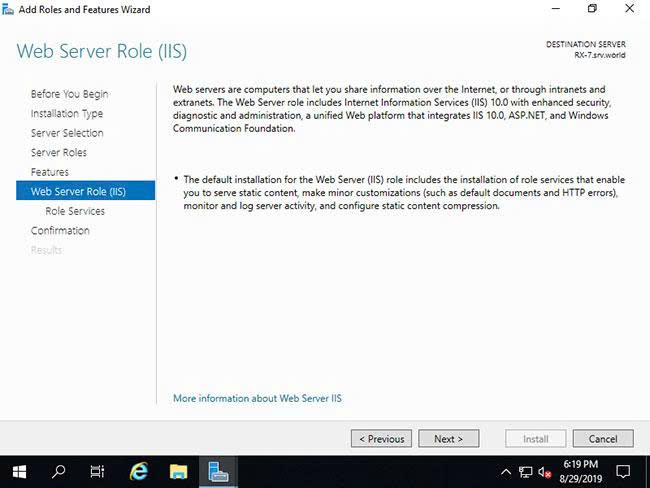
Click the Next button (the Web Server Role (IIS) screen).
-
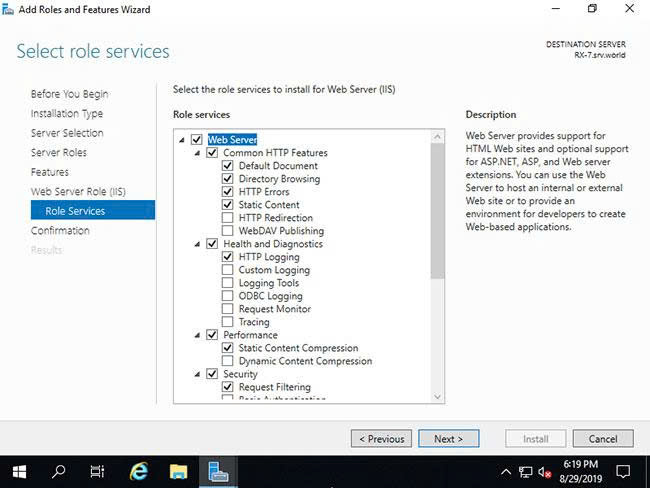
Select the Web Server features (keep the defaults) — additional ones can be added after installing IIS.
-
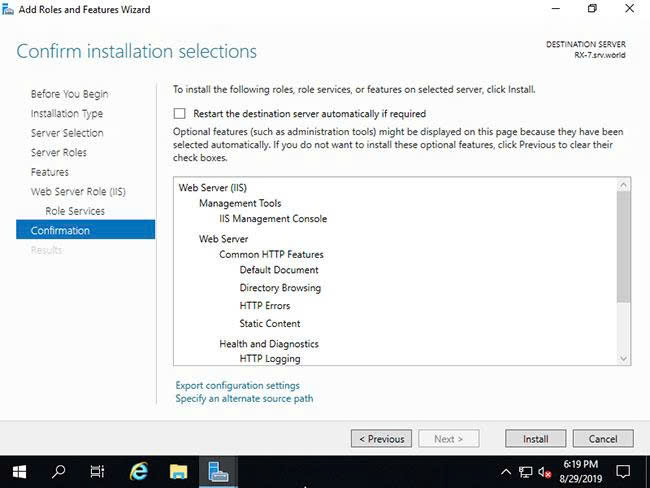
Click the Install button.
-
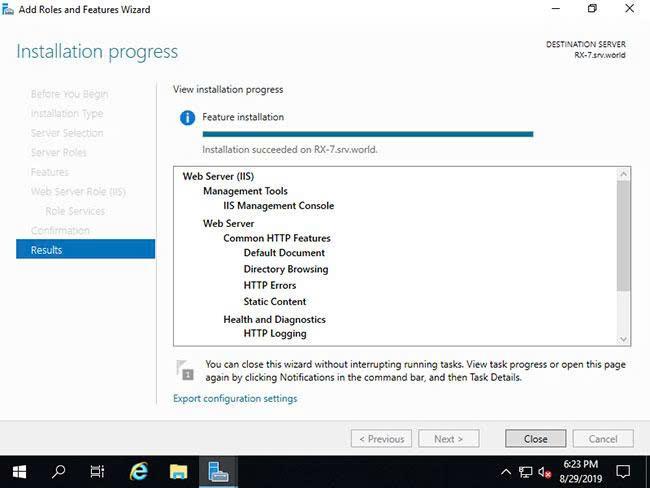
Once installation finishes, click the Close button.
Installing the API
-
Download the API package (Download) and extract it into a folder (e.g.,
D:\RMS\api_sign_rms). -
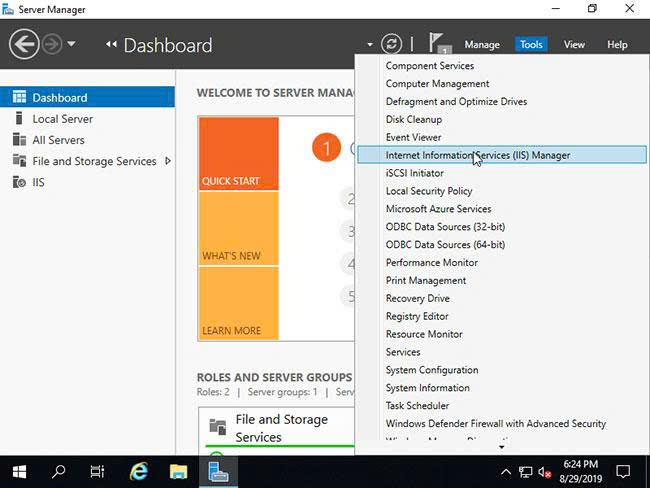
Run Start → Server Manager → Tools → Internet Information Services (IIS) Manager.
-
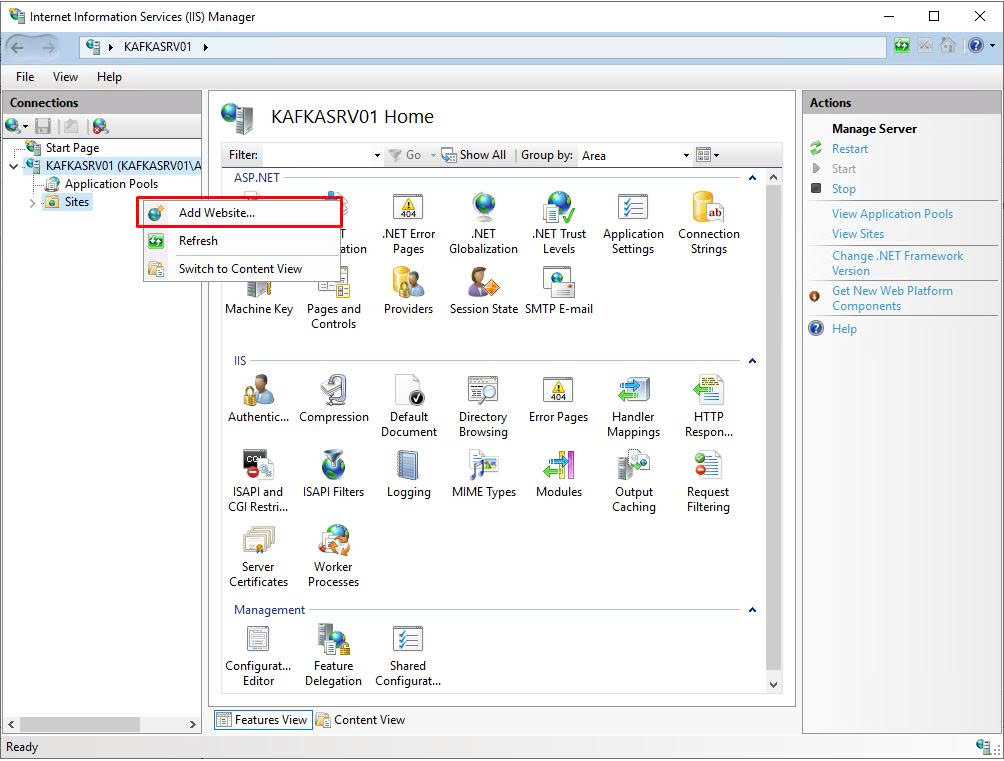
Open the items in the left-hand panel → Add Website.
-
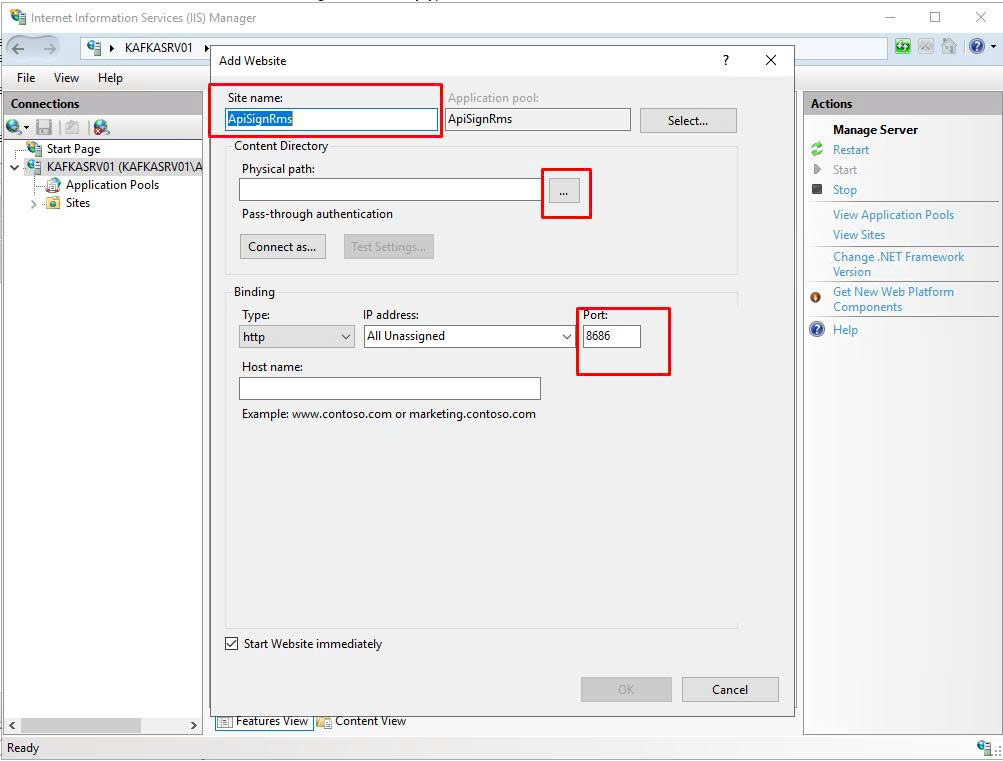
Configure the API (using HTTP):
-
Site name: set a name for the API (e.g.
ApiSignRms). -
Physical path: select the path containing the code extracted in step 1.
-
Port: set the port for the API.
-
Go to Application Pools → select the API name you just set → Advanced Settings → set Load User Profile =
True→ OK.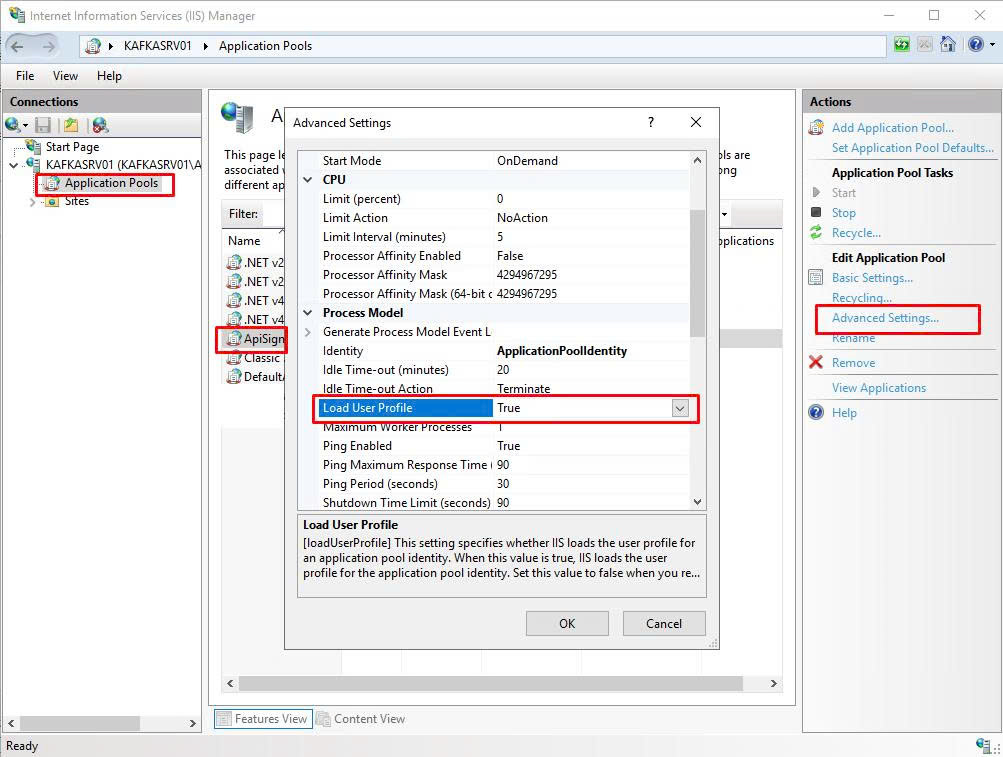
-
-
Configure the API (using HTTPS — recommended for Production):
-
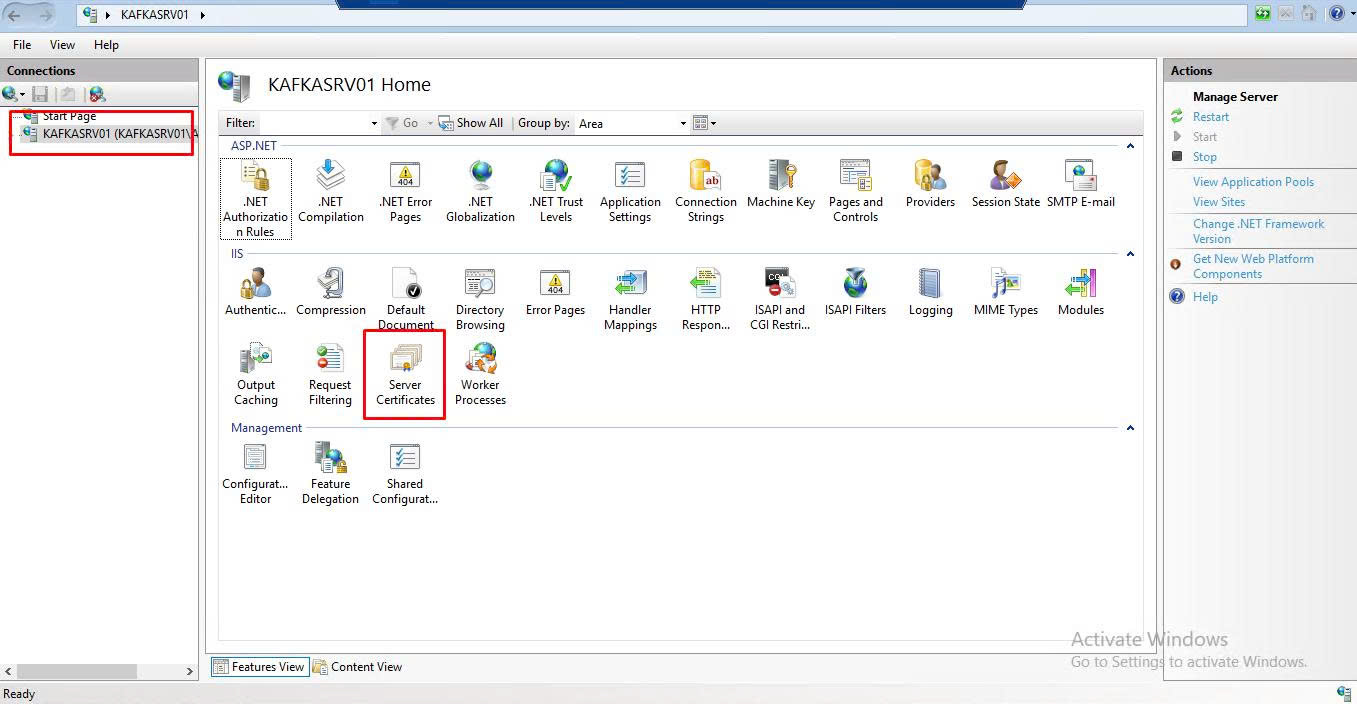
If SSL has not been imported yet: go to Server Certificates.
-
Import → select the
.pfxcert file → enter the cert file's Password → OK.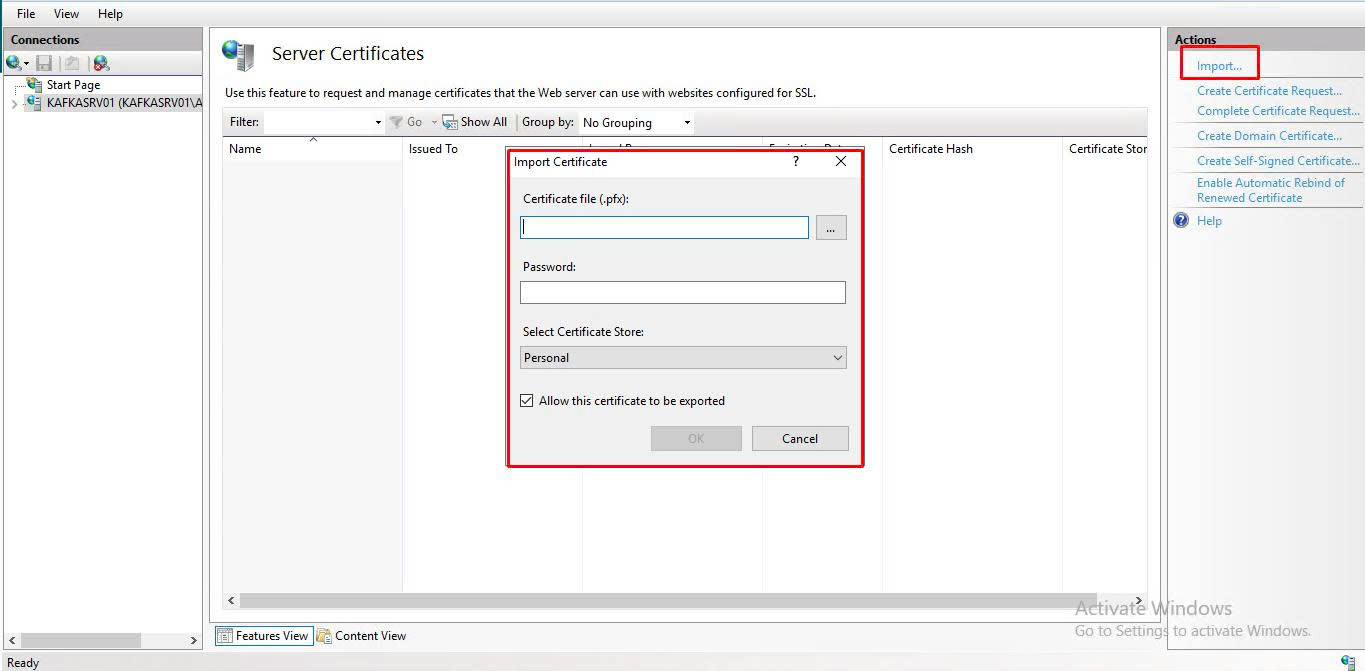
-
Add Website: Site name / Physical path as above → Type:
https→ Port: default443→ SSL certificate: select the certificate you just imported.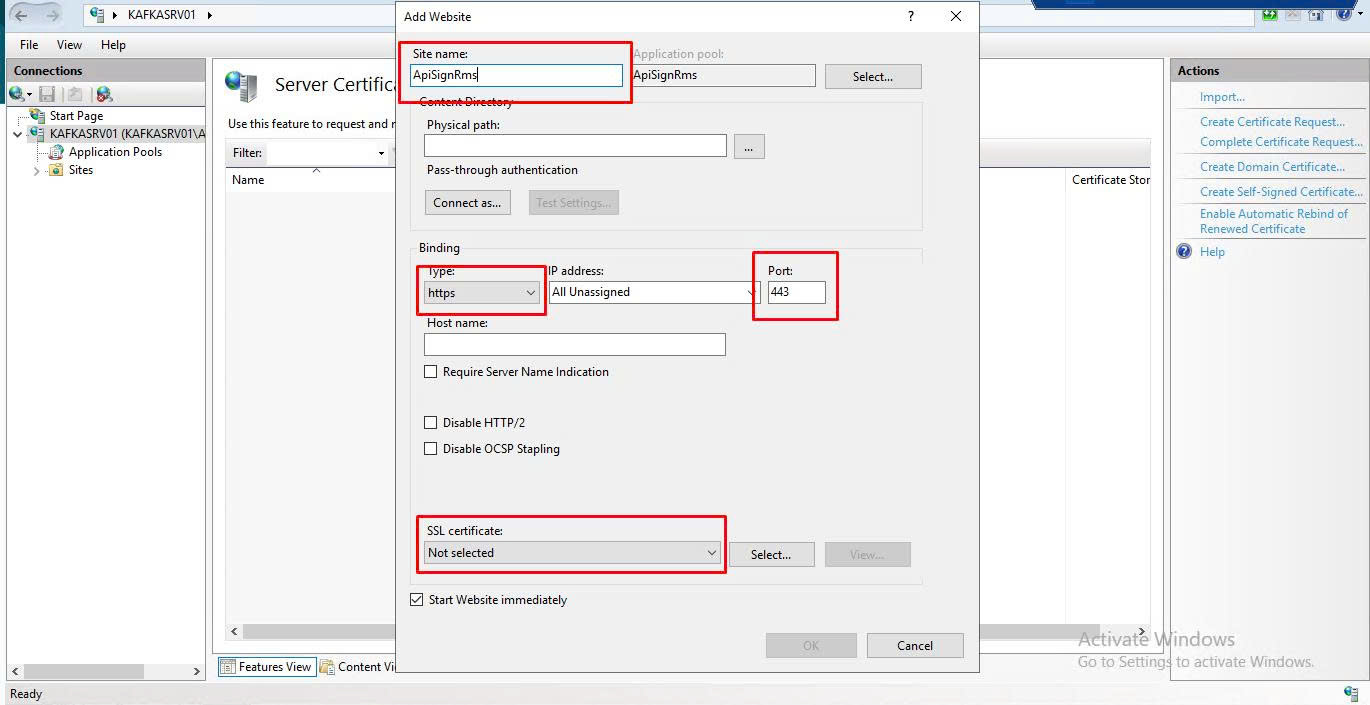
-
Also go to Application Pools → select the corresponding pool → Advanced Settings → set Load User Profile =
True→ OK.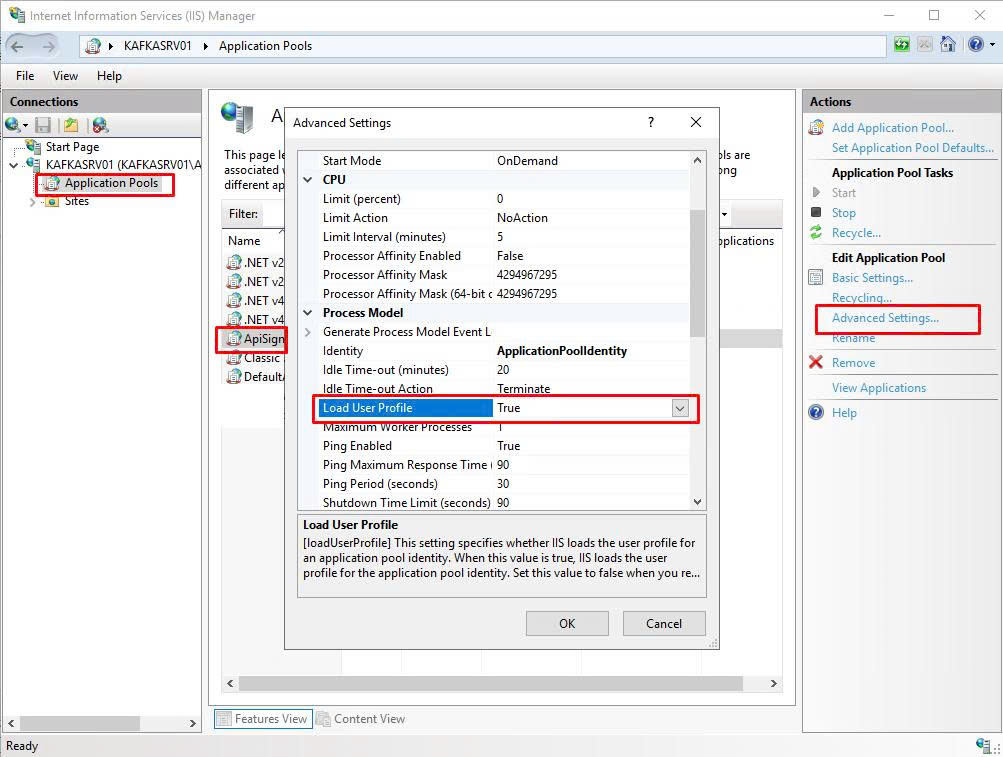
noteIf Server Certificates contains multiple SSL certificates from different organizations, and the websites use SSL certificates from different organizations, also check Require Server Name Indication.
-
-
Set up the environment: open the
configRMS/config.xmlfile (located in the extracted folder) to configure the test or production environment.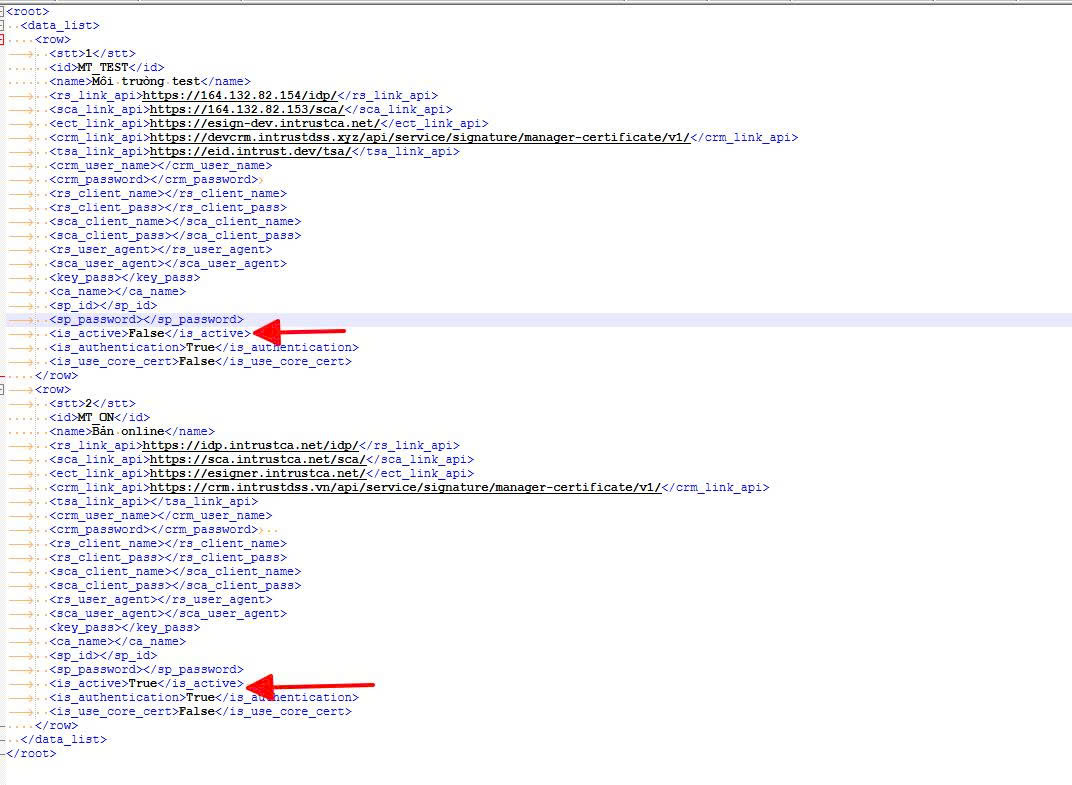
Field Description rs_link_apiIDP (Identity Provider) endpoint sca_link_apiSCA (Signature Creation Application) endpoint ect_link_apieSigner endpoint crm_link_apiCRM endpoint — manages digital certificates tsa_link_apiTSA (Timestamp) endpoint crm_user_name/crm_passwordCRM connection account rs_client_name/rs_client_passClient credentials for RS (IDP) sca_client_name/sca_client_passClient credentials for SCA rs_user_agent/sca_user_agentUser-Agent identifying calls to RS/SCA key_passSigning key password (if applicable) ca_nameCA organization name sp_id/sp_passwordService Provider ID/password is_activeTrue/False— enable exactly 1 row for the environment to be usedis_authenticationEnable/disable additional authentication is_use_core_certEnable/disable use of the core certificate Example
config.xmlstructure with 2 environments (MT_TESTandMT_ON— the online/production version); sensitive fields (passwords, client secrets) are left blank in the template, and the Partner fills in the values provided by Intrust DSS:<root><data_list><row><stt>1</stt><id>MT_TEST</id><name>Môi trường test</name><rs_link_api>https://164.132.82.154/idp/</rs_link_api><sca_link_api>https://sca.intrustca.net/sca/</sca_link_api><ect_link_api>https://esign-dev.intrustdss.xyz/</ect_link_api><crm_link_api>https://devcrm.intrustdss.xyz/api/service/signature/manager-certificate/v1/</crm_link_api><tsa_link_api>https://eid.intrust.dev/tsa/</tsa_link_api><crm_user_name></crm_user_name><crm_password></crm_password><rs_client_name></rs_client_name><rs_client_pass></rs_client_pass><sca_client_name></sca_client_name><sca_client_pass></sca_client_pass><rs_user_agent></rs_user_agent><sca_user_agent></sca_user_agent><key_pass></key_pass><ca_name></ca_name><sp_id></sp_id><sp_password></sp_password><is_active>False</is_active><is_authentication>True</is_authentication><is_use_core_cert>False</is_use_core_cert></row><row><stt>2</stt><id>MT_ON</id><name>Bản online</name><rs_link_api>https://idp.intrustca.net/idp/</rs_link_api><sca_link_api>https://sca.intrustca.net/sca/</sca_link_api><ect_link_api>https://esigner.intrustca.net/</ect_link_api><crm_link_api>https://crm.intrustdss.vn/api/service/signature/manager-certificate/v1/</crm_link_api><tsa_link_api></tsa_link_api><crm_user_name></crm_user_name><crm_password></crm_password><rs_client_name></rs_client_name><rs_client_pass></rs_client_pass><sca_client_name></sca_client_name><sca_client_pass></sca_client_pass><rs_user_agent></rs_user_agent><sca_user_agent></sca_user_agent><key_pass></key_pass><ca_name></ca_name><sp_id></sp_id><sp_password></sp_password><is_active>True</is_active><is_authentication>True</is_authentication><is_use_core_cert>False</is_use_core_cert></row></data_list></root> -
Configure Basic Auth authentication accounts: edit the
../xml/XmlData/userlist.xmlfile to declare the list ofusername/password(base64 string, self-defined) that the application/party calling into this self-hosted API cluster will use to authenticate (Authorization: Basic Base64(username:password)) — see Authentication. Example structure:<?xml version="1.0" encoding="UTF-8"?><root><data_list><row><username>DEyM2</username><password>DEyM2QDEyMDEyM2==</password><status>HOAT_DONG</status></row></data_list></root>
References
- Test Account Provisioning
- API Reference and Quick Start — guides for calling the API after installation.
- Download the API package (Example Demo)