Test Account Provisioning (Test Account)
This page provides a step-by-step guide to provisioning a Remote Signing (RMS) test account for the partner, used to test integration flows before going live in Production
Requirements
Environment
- iOS: from version 12.4, supports biometrics (fingerprint/Face ID).
- Android: from version 1.0.3, supports biometrics (fingerprint/Face ID).
Identity Documents
National ID Card (CCCD) / old ID Card (CMND) / Passport matching the subject registering for the remote signature (use real information so the eKYC system can verify it).
1. Install the IntrustCA App
-
Download the IntrustCA app from the App Store/Google Play.
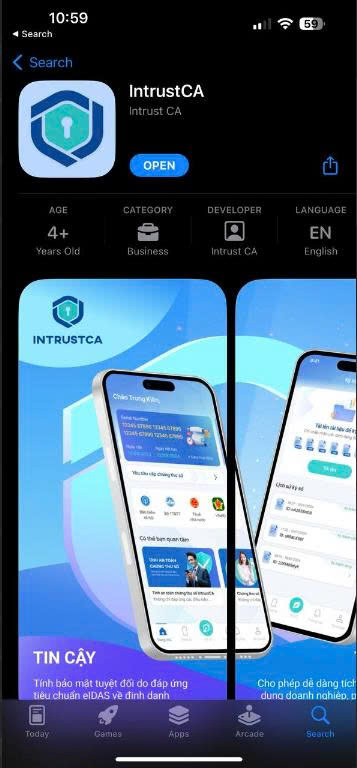
-
Switch to the
devversion (used for the test environment): go to Account → Update, tap the software version line 10 times in a row to switch. Check that the version name has thedevsuffix (e.g.1.0.3.v55.dev) to confirm the switch succeeded.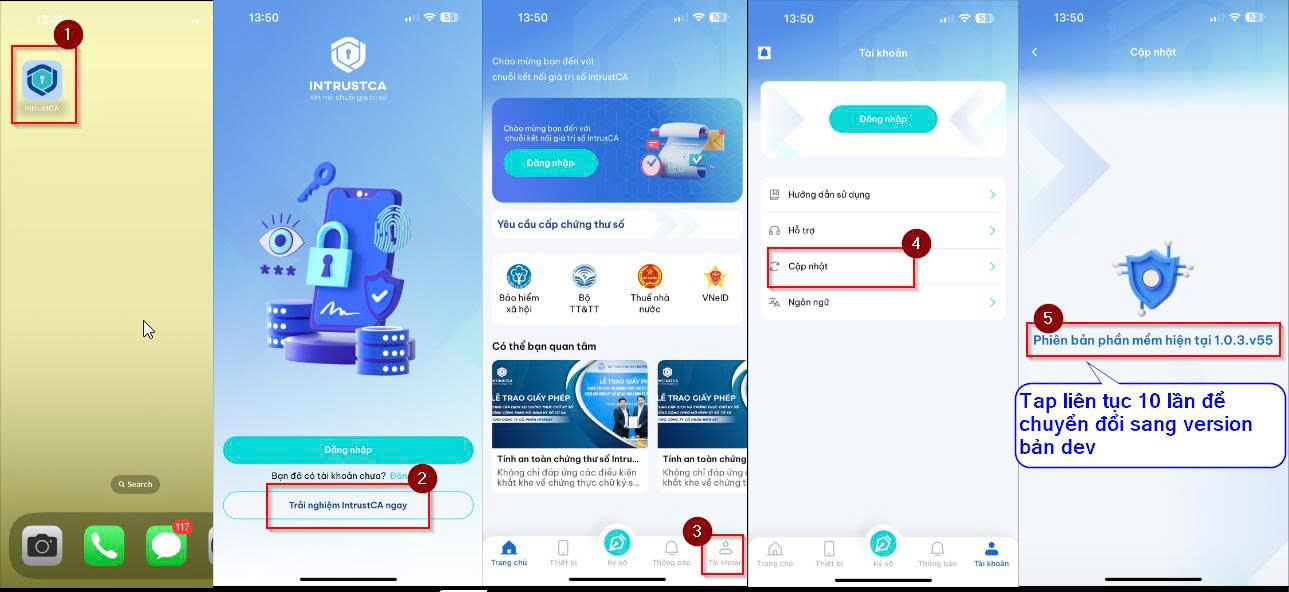
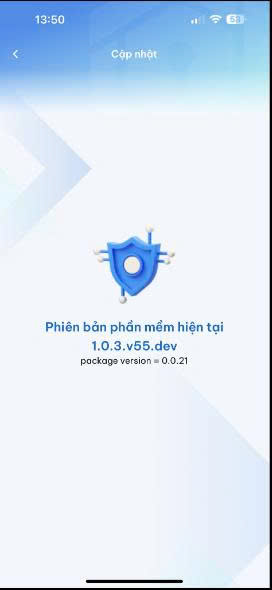
The step to switch to the dev version applies only to the test environment (UAT/demo) — do not perform it on the app used for Production.
2. Register for a Remote Signature
-
In the app, tap Register, and fill in the form with real information (full name, phone number, email, address, etc.) so the system can verify eKYC. Enter the promo code:
CERT@DEMO.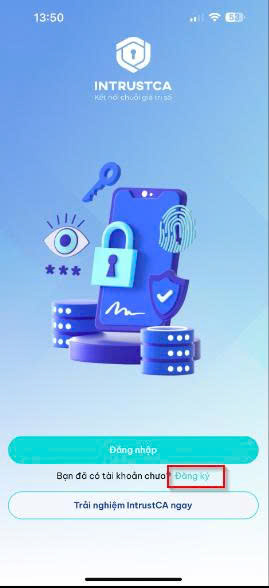
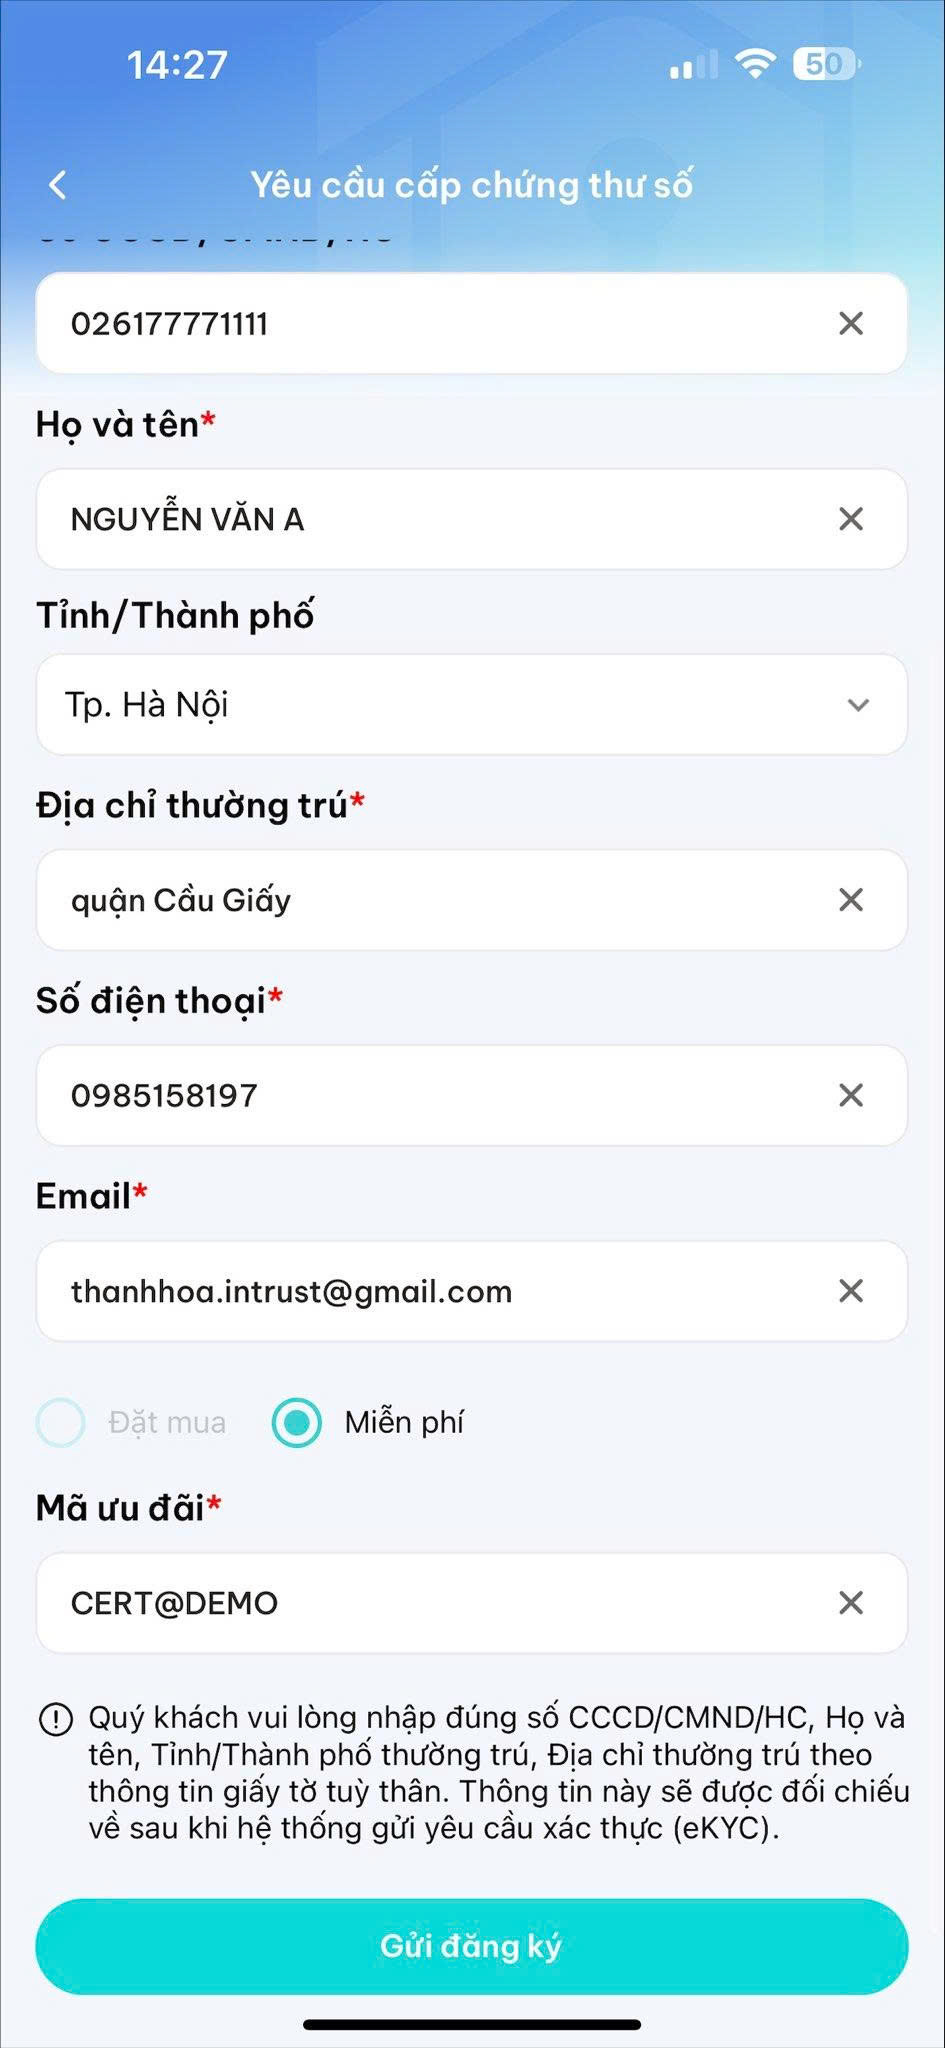
-
Tap Submit Registration → check the registered email, open the "subscriber information verification" email → click the "click here" link in step 2 of the email to open the IntrustCA app and perform identity verification (eKYC).
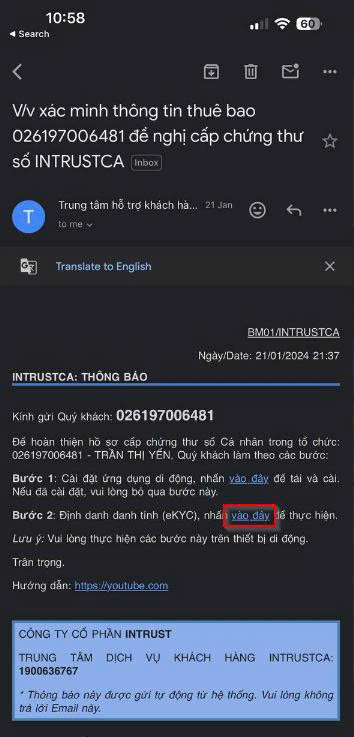
-
Complete eKYC identity verification successfully.
-
The system then sends a "Remote Signing RMS Account Notification" email (including the username/password) → click the "click here" link in step 2 of the email to open the app, set up the native device, and confirm the RMS account.
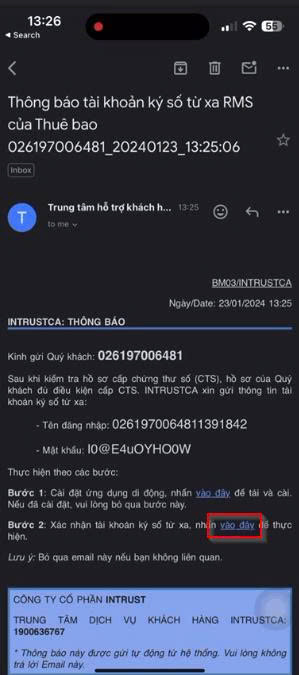
The test environment uses the default OTP code 123456 for confirmation. The CERT@DEMO promo code and the 123456 OTP apply only to the test/demo environment, not to Production. After this step, the account is ready for the Native Device Authentication flow.
3. Activate the PIN Code
-
Log in to the RMS account (username/password received via email in the step above) at
https://rmsportal.intrustdss.xyz/, as mentioned in Architecture).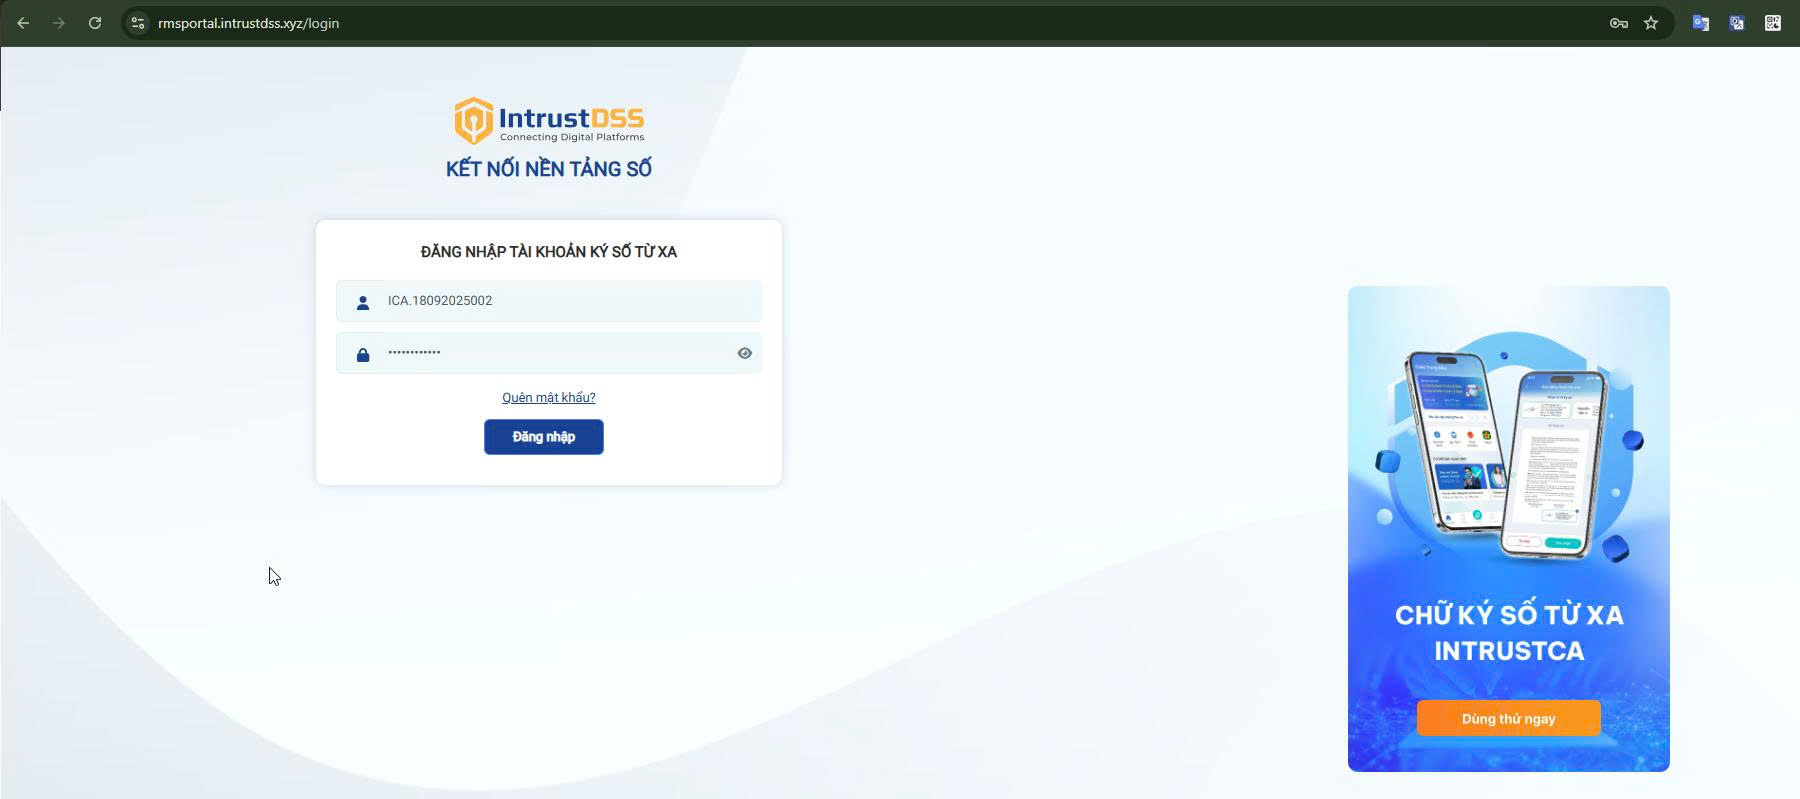
-
Tap Get Code, and enter the default OTP code
123456.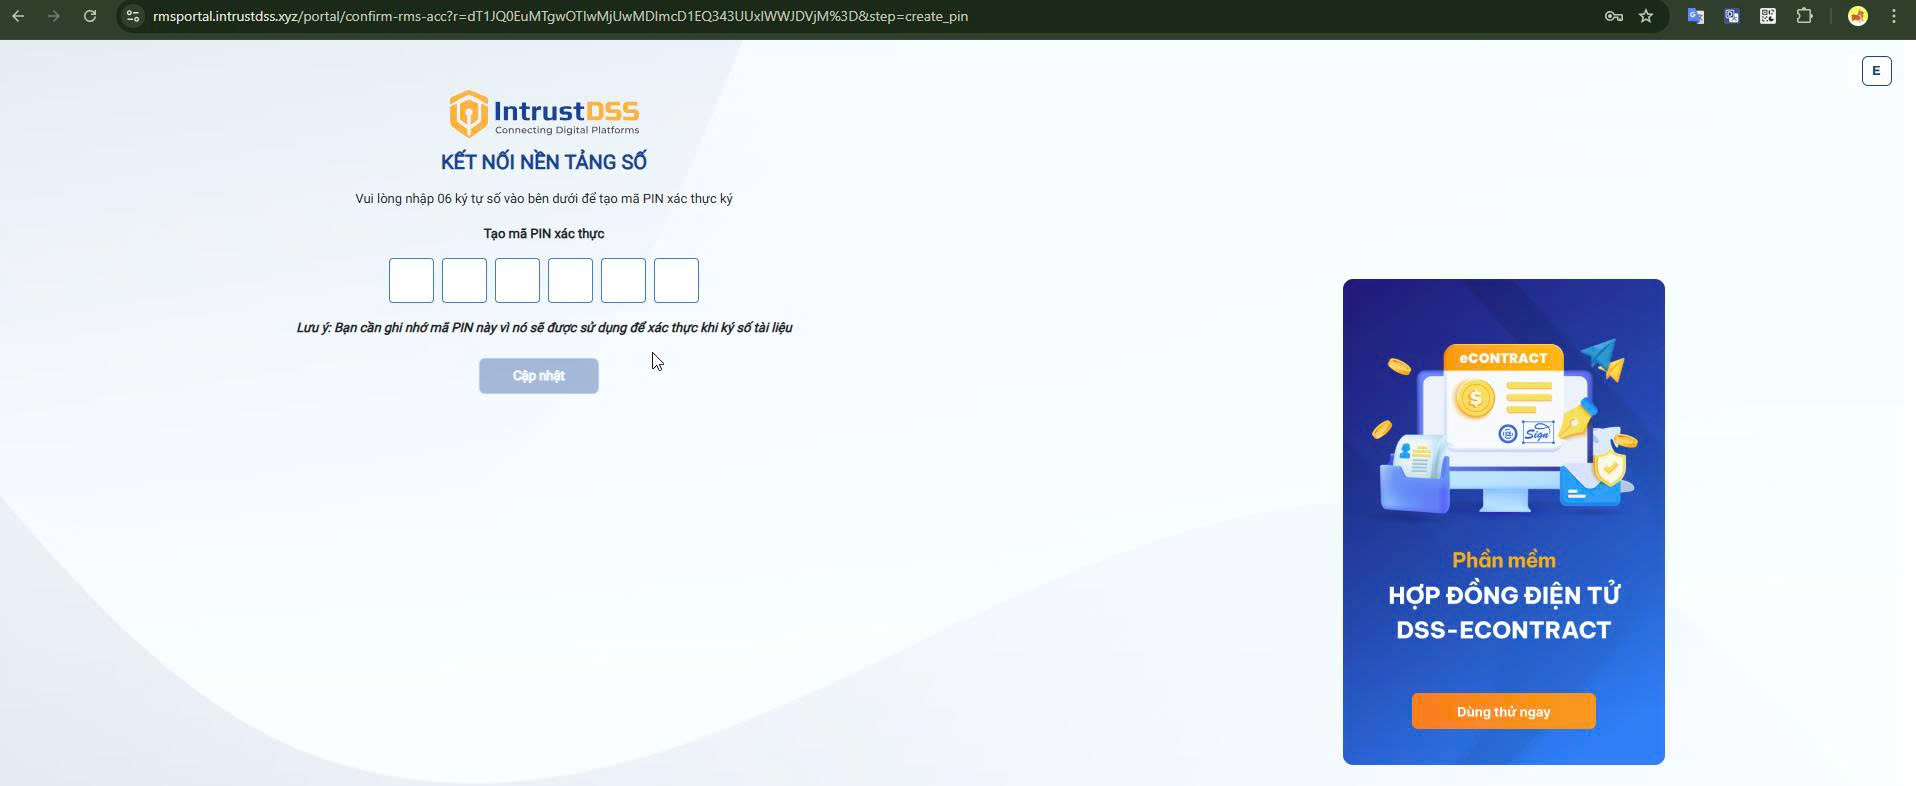
-
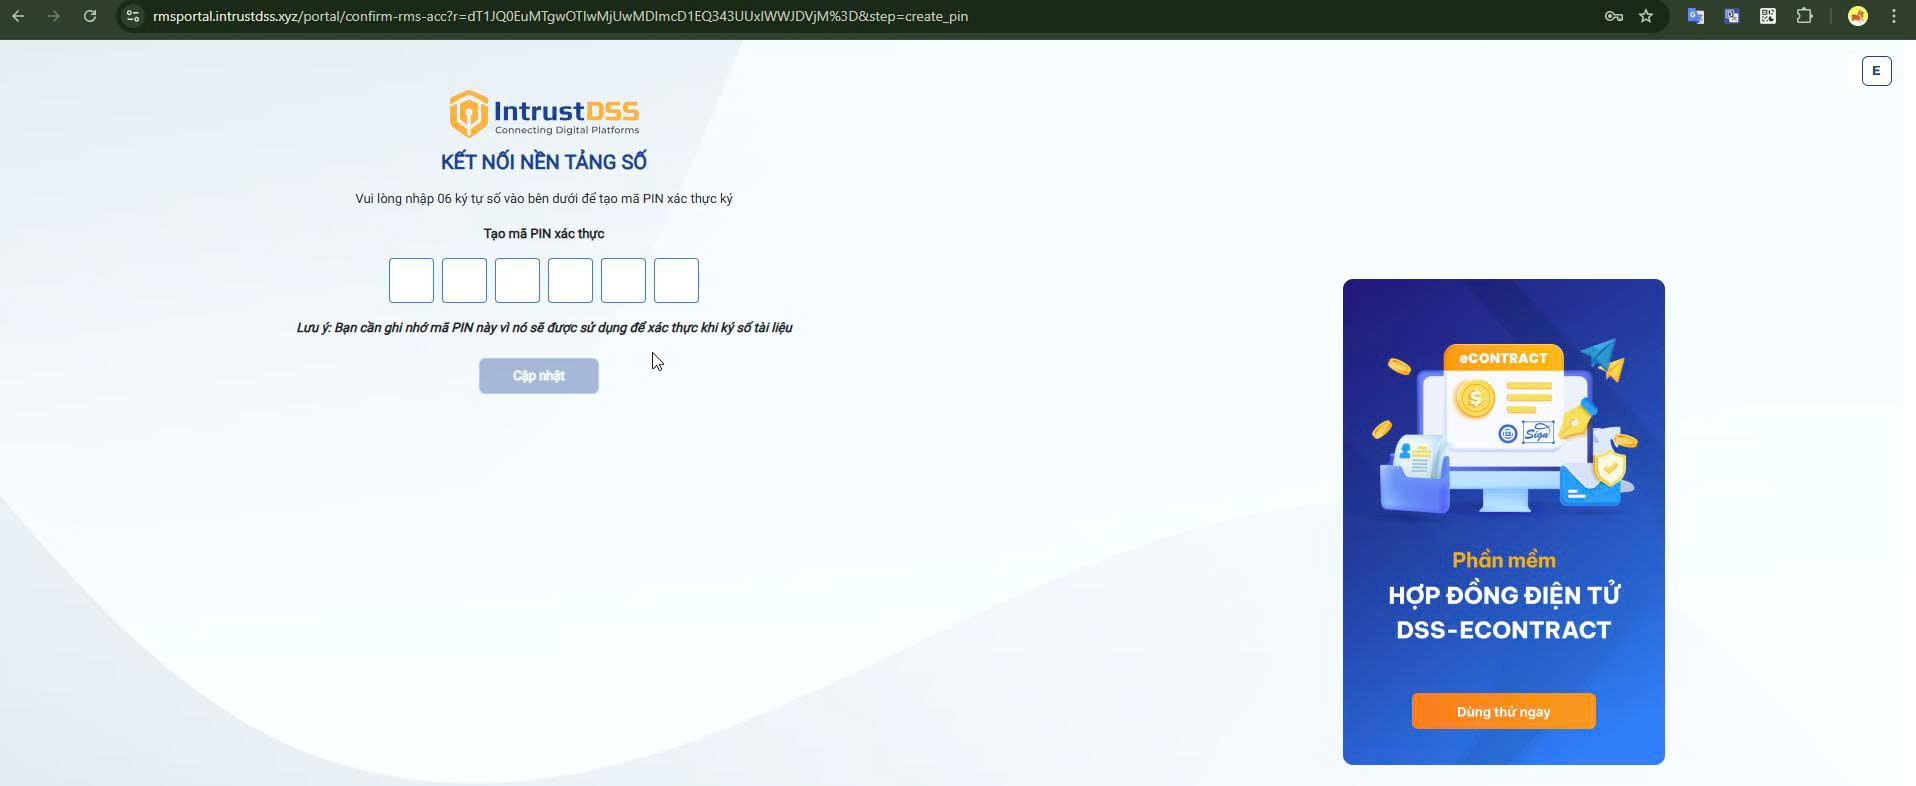
Set up the PIN code used to authenticate signing for the RMS account.
-
Tap Confirm on the CTS information to finish.
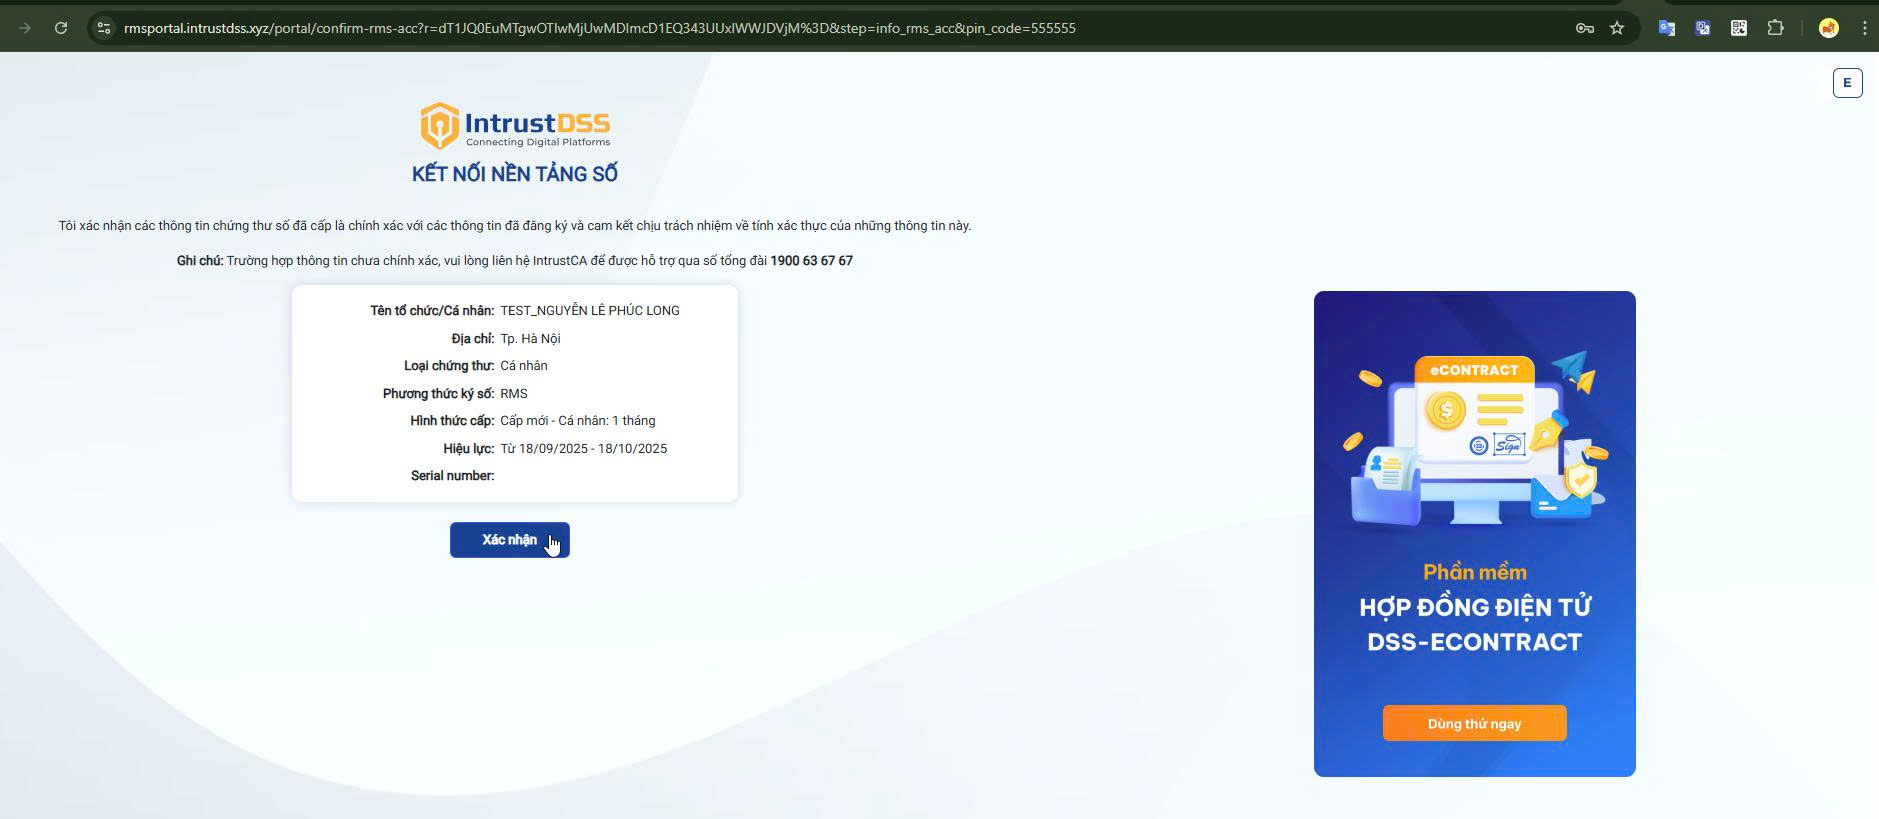
After this step, the account is ready for the PIN Code Authentication flow.
See Also
- CTS Issuance Process via MOBILE APP
- Registration & CTS Issuance Process via Portal
- UAT & Go-Live Checklist
- Guide to Registering for CTS Issuance via Electronic Means — Remote Signing with PIN Code Authentication — a similar flow for official (non-test) accounts, including changing/recovering passwords and PIN codes.